Understand How 3D Materials Work (Advanced Guide)
This post provides knowledge about how materials work in zerolens. If you are a professional user and want to understand more about materials, this is the post for you. If you don't know what 3D materials are or you just want to get your 3D model into the platform, rather take a look at this post on How to upload your 3D model. Let's jump right into it!
1. Intro to materials
Materials at zerolens represent the properties of a 3D model's appearance in a photo. Like in the real world, different material properties interact differently with light. At zerolens we provide you with an extensive library of pre-made materials.

2. Understanding the parameters of each material
In zerolens, each material consists of 8 parameters that decide how the material behaves. In the following part we will discover each parameter and understand how different values produce different results.
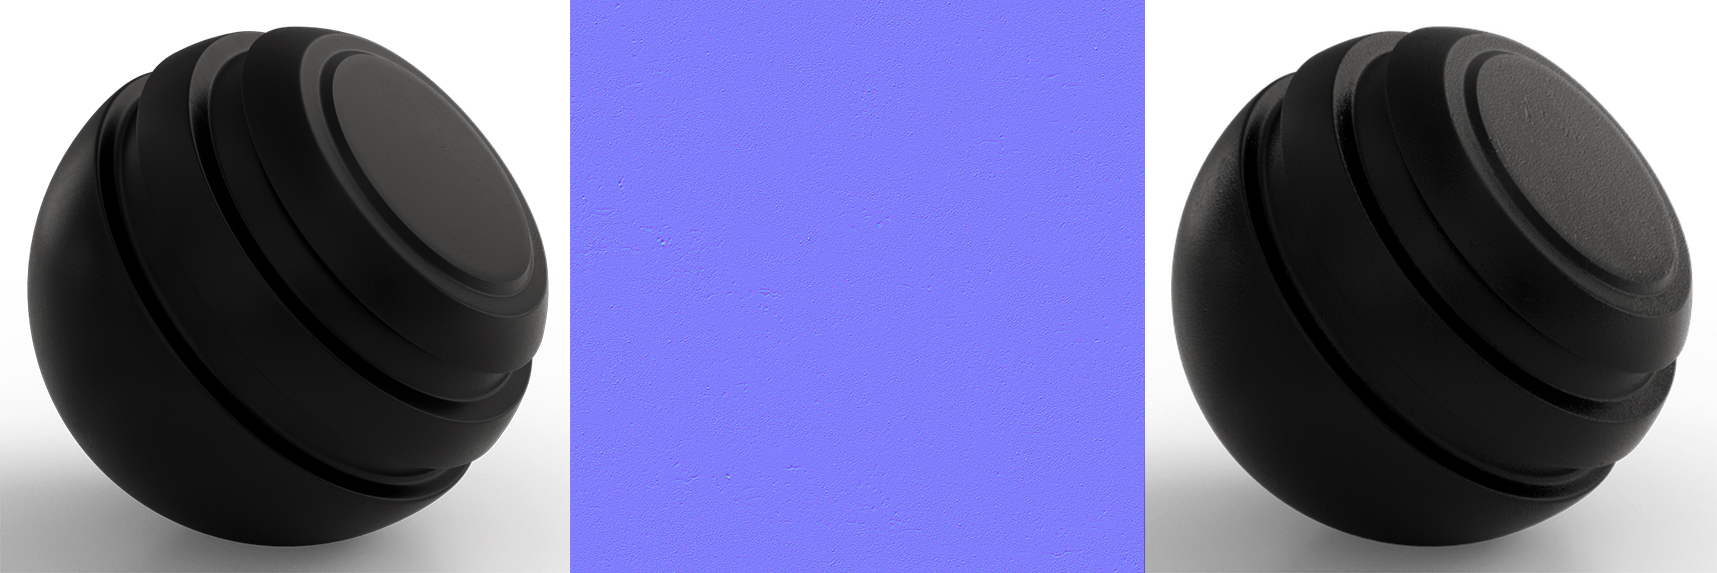
2.1 Base color
Is the color/pattern of the material on a 3D model. You can add a .jpg or .png file or choose a single RGB/Hex color value.
Here is an example of a base color map for a product:
2.2 Roughness
Describes how rough or glossy a material is. You can use a .jpg or .png file as map to describe a materials roughness or choose a single color value.
Roughness is measured in a scale between 0 and 1 or the colors between black and white:
- 0 means 0% roughness = black
- 1 means 100% roughness = white

2.3 Normal map
Is a parameter that adds imperfections to a material to make it look more realistic. A normal map also can be adjusted in its strength with a value between 0 and 1:
- 0 = 0%
- 1 = 100%
2.4 Metalness
Describes how metallic a material looks like. You can add either a .jpg or .png file or choose a single color value. Metalness is measured in a scale between 0 and 1 or the colors black/white:
- 0 = 0% metalness = black
- 1 = 100% metalness = white
In reality a material is either 100% metallic or 0% metallic. There is nothing in between.

2.5 Height map
Is a parameter that adds imperfections to a material to make it look more realistic. A height map needs to be a quadratic image with colors between black and white in it.

2.6 IOR (Index of Refraction)
The index of refraction (IOR) describes how light moves through a material. More precisely, this index determines how much the path of light is bent when it enters a material.
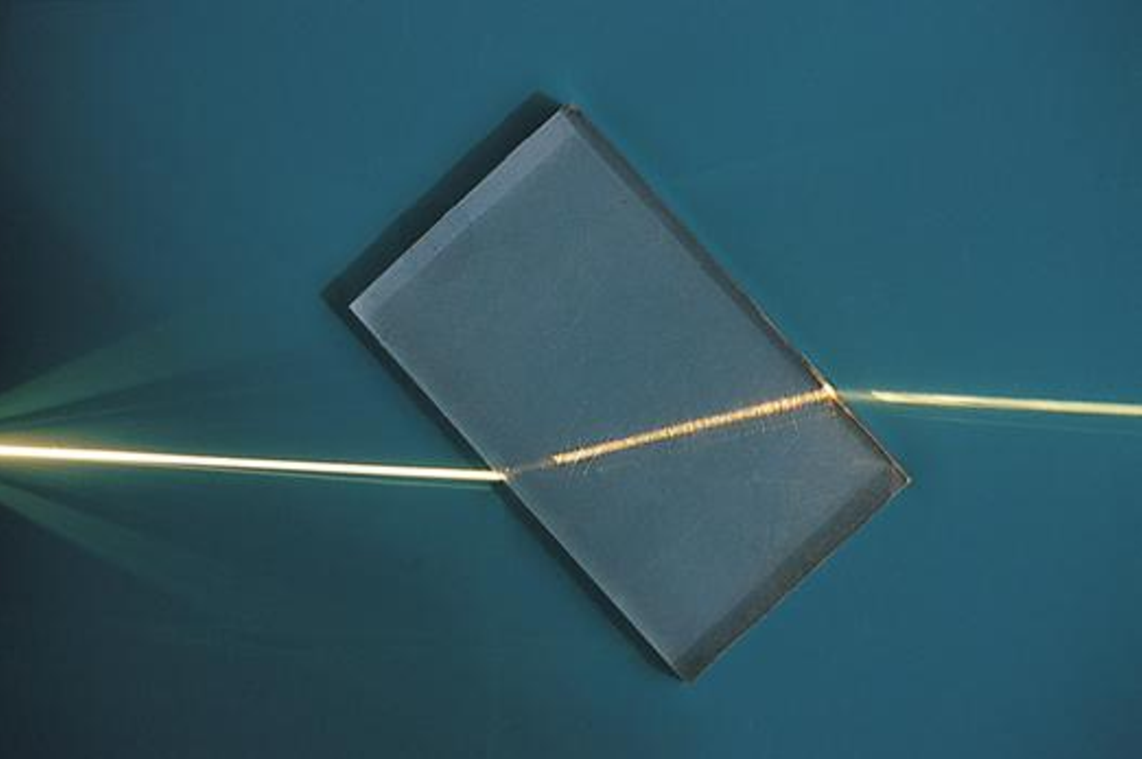
Each material has an IOR, for example:
- Water = 1.3
- Diamond = 2.4
- Glass = 1.5
You can search on this website for the right IOR for the material you are trying to achieve.
2.7 Refraction
Describes easily how transparent a material looks like. This value is measured in a range between 0 and 1:
- 0 = 0% refraction = intransparent
- 1 = 100% refraction = transparent
Currently these are all the possible material properties that you can change when editing a zerolens material. Cheers. :)


